Flask中路由参数传递、请求方式小结
I am not a designer nor a coder. I'm just a guy with a point-of-view and a computer.
筑基<融合<元婴<分神<渡劫<大乘
一、参数设置
1.参数类型
(1)string
(2)int
(3)float
2.未指定参数类型
在url中传入参数时,如果没有指定参数的类型,会默认为参数是string类型。
如下:
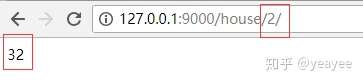
没有给id指定参数类型,id默认是string类型,想要对id做运算,就必须先转化成int类型,最后返回的内容必须是字符串,所以再转成string类型。
@house_blueprint.route('/<id>/')
def h(id):
    id = int(id) ** 5
    id = str(id)
    return id
运行结果:
3.指定参数类型
(1)int、float类型
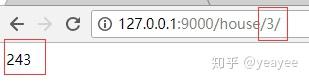
给参数指定类型,就在参数前加上参数类型和冒号即可。如下,指定id是int类型,可以直接进行运算。
@house_blueprint.route('/<int:id>/')
def h(id):
    id = id ** 5
    id = str(id)
    return id
    return id
运行结果:
(2)path类型
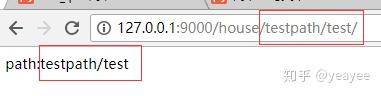
指定path类型,可以获取当前路径,值得注意的是获取的不是完整路径,只是此处传入的路径参数,如下获取的路径是 testpath/test。
@house_blueprint.route('/<path:url_path>/')
def h(url_path):
    return 'path:%s' % url_path
运行结果:
(3)uuid类型
@house_blueprint.route('/<uuid:uu>')
def h(uu):
    return 'uu:s' % uu
二、请求方式设置
flask中请求默认是get请求,若想要指定其他请求方式,用参数methods指定。如用户注册时,需要把用户填写的数据存入数据库,生成一条新用户的记录,此处就需要用到post请求。
@house_blueprint.route('/register/', methods=['POST'])
def register():
    register_dict = request.form
    username = register_dict['usrename']
    password = register_dict.get('password')

    user = User()
    user.username = username
    user.password = password
    db.session.add(user)
    db.session.commit()

return '创建用户成功'参考:https://www.jianshu.com/p/e1b7d85efccb
三、全局变量上下文引用
关于上下文引用及全局变量的概念,详见《狗书》。该书中博客删除评论的示例也用到的全局变量。读者可以思考和页面传参的差异。
from flask import g
@app.route('/search', methods=['get', 'post']) #这是搜索页面
def fsearch():
    ....
    if request.method == 'POST':
        g.results = multiselect(request) #这是处理表单的函数,reslults为list类型变量
        fresult()
        ...
    return 'done'

@app.route('/result', methods=['get', 'post']) #这是结果页面
def fresult():
    results = g.results
    ...
    return render_template("result.html")
四、传参示例
(一)Cookies传参
1 from flask import Flask, request
2 from flask import make_response
3
4
5 app = Flask(__name__)
6
7 #获取cookie
8 @app.route('/get_cookie')
9 def get_cookie():
10     name = request.cookies.get('passwd')
12     return  name
13
14 #删除cookie
15 @app.route('/del_cookie')
16 def del_cookie():
17     resp = make_response('delete_cookie')
18     resp.delete_cookie('passwd')
19     return resp
20
21 #设置cookie
22 @app.route('/set_cookie')
23 def set_cookie():
24     resp = make_response('set_cookie')
25     resp.set_cookie('passwd', '123456')
26     return resp
设置、获取、删除Cookies中的参数。
(二)静态模板中传参
<!DOCTYPE html>
<html lang="en">
<head>
    <meta charset="UTF-8">
    <title>带参URL传值方法</title>
</head>
<body>
    <a href="{{ url_for('test',name=1) }}">点击这里查看</a>
</body>
</html>url_for('test',name=1)相当于我们传递的XXX/?name=1,点击这个链接,执行了动态路由test,并将name传入输出,此时显示:http://localhost:5000/test/1
from flask import Flask, render_template

app = Flask(__name__)

@app.route('/')
def my():
    return render_template('/test.html')

@app.route('/test/<name>', methods=['GET'])
def test(name):
    print (name)
    return render_template('/test.html')

if __name__ == '__main__':
   app.run(debug=True)
(三)URL中传参
可以使用Flask request方法:request.args.get(),例如,前台请求URL为 http://localhost:5000/tk?p=1&type=1
@app.route('/tk', methods=['post','get'])
def tk():
    p = request.args.get('p')
    type = request.args.get('type')
    print(p)
    print(type)
    return jsonify({'t': [p, type]})
五、小结
(一)get请求
request.args.get("key") 获取get请求参数
(二)post请求
request.form.get("key", type=str, default=None) 获取表单数据
request.values.get("key") 获取所有参数
# 参数解析对象生成
parser = reqparse.RequestParser()
args = parser.parse_args()
(三)文件上传
from werkzeug.utils import secure_filename
@app.route('/uploads', methods=['GET', 'POST'])
def uploads():
    if request.method == "POST":
        fe = request.files['files']
        # basepath = os.path.dirname(os.path.abspath(__file__))
        basepath = os.path.abspath(os.path.dirname(__file__))
        upload_path = os.path.join(basepath, 'static', 'upload')
        # f.filename可以拿到文件名,但是是客户端定义的名,不要相信这个名称,用secure_filename包装一下
        fe.save(upload_path+'/'+secure_filename(fe.filename))
        # 这里的url_for 和jinja的前端用法不一样,可以忽略.的引用
        # url_for重定向
        return redirect(url_for('uploads'))
    return render_template('upload.html')